People who know me well will all testify to the fact that I am nothing if not forgetful. I also like sourdough bread. Or more specifically, I like making sourdough bread. Lyndsey really likes eating sourdough bread, which is probably why I enjoy making it so much.
Unfortunately, forgetfulness and sourdough don’t mix. A necessary element of making good sourdough is having a good starter. A good starter requires care and consistent feeding. I’ve made several good starters previously, but they would eventually die when I just forgot to feed them for a couple of days (or, in the case of starters I put in the fridge, a couple of weeks). When a starter dies, it generally takes at least a week or so to get a new starter going, and to ensure it’s healthy and active enough for baking, which just isn’t something I have the patience to do repeatedly. So, I just stopped making sourdough for a while, and spent some time perfecting a sandwich loaf. I’ll share that recipe at some point.
However, the hankering for sourdough hit me again, so I wanted to see if I could devise a little hack that would allow me to bake pretty darn good sourdough bread without needing to tend to a starter. I wish I could regale you with tales of trial-and-error and troubleshooting, but my first attempt worked out really well, and this little hack seems to be almost foolproof.
Before we get to that, however, a little background about sourdough starter:
Starter is composed of 4 crucial elements: water, flour, lactic acid producing bacteria (LAB from here on), and wild yeast. You provide the water and flour, and trace amounts of wild yeast and LAB are already present in the flour (and some may come from the air, from your hands, from the mixing utensils, etc. Wild yeast and LAB are everywhere). When you start tending a starter, a full-on bacterial war begins as the LAB fight for supremacy against other strains of bacteria. When a starter dies, or if it simply fails to thrive, it’s generally because the LAB lost the war, and you need to start over. However, when the LAB win, they form a symbiotic relationship with the wild yeast. The LAB decrease the pH of the mixture (making it more acidic) which kills off most other bacterial strains, while providing an ideal environment for the LAB and the yeast. Furthermore, the LAB break down starches, producing sugars. The yeast ferments those sugars, creating some alcohol and a lot of carbon dioxide. The carbon dioxide is what gives bread its bubbles. Once you have a stable community of LAB and wild yeast in your starter, they’ll generally maintain control over their territory, warding off other bacterial interlopers, as long as you feed the starter regularly.
Sourdough bread tastes different than bread made with commercial yeast, primarily due to the activity of the LAB. LAB produce (as the name implies) lactic acid, and also acetic acid. Lactic acid and acetic acid (moreso acetic acid) give sourdough its characteristic flavor. Acetic acid is also the primary acid in vinegar, so vinegar is sometimes added to bread made with commercial yeast to make something that approximates the flavor of sourdough. Commercial yeast works WAY faster than wild yeast does, which doesn’t give the LAB time to produce lactic and acetic acid to create flavor in the bread. You can make a loaf of bread with commercial yeast in ~2-3 hours start-to-finish (with 2 rises). Making good sourdough is an all-day (or multi-day) affair. The combination of time and the density of LAB in the sourdough starter allows more flavor to be developed.
While commercial yeast works faster than wild yeast, it’s also more fragile. Its speed contributes to its fragility. It multiplies rapidly, consumes sugars quickly, and then starves itself to death within a matter of hours. Wild yeast works slower, but it’s also heartier. Crucially, when wild yeast and commercial yeast are present in the same starter, the wild yeast will stick around after the commercial yeast has already worn itself out.
That’s the magic behind this sourdough hack. Here’s what I do to make an accelerated starter:
In a bowl, mix 100g of whole wheat flour, ~25-50g of something with high amounts of lactic acid bacteria that’s a liquid or at least semi-liquidy (I generally use nonfat kefir, but I’ve also used yogurt and cultured buttermilk. The key is to ensure it has active LAB cultures and an acidic pH), ~75ish grams of water, and a little shake of instant yeast (I never measure it, but it can’t be more than a gram or two). You may want to add a touch more water; the mixture should look like a flour/water mix at 100% hydration, and different LAB-containing ingredients have different water contents.
Leave this mixture covered in a bowl for about 12-16 hours at room temperature. During this time, the LAB and commercial yeast quickly colonize the starter, the commercial yeast die, and the wild yeast can rise up to take their place.
For the actual bread itself (note, this recipe assumes some basic level of boule-baking knowledge; if you need or want info about the actual steps of making sourdough, that’s easier to learn from a video. This is a really solid video on the topic):
- Mix 500g of bread flour and 350g of water in a bowl and let it autolyse for about an hour.
- After the autolyse, add the cheater starter to the dough. I generally just mix and fold it in with a silicone spatula. It doesn’t have to be 100% homogeneous at this stage.
- Leave that mixture to rest for about an hour, with 25g of kosher salt sprinkled over the top. Sprinkling the salt on top allows the salt to begin dissolving without actually incorporating into most of the dough yet. Salt tightens gluten strands and slows down yeast activity; at this stage, we’re trying to make sure the wild yeast and LAB are active and beginning to permeate the dough, so we don’t want the salt fully worked into the dough yet.
- After an hour, incorporate the salt into the mass of dough by pinching it in, and bring the dough together into a fairly smooth mass using the slap-and-fold-over technique. Place the dough in a covered bowl.
- Every 15-30 minutes, stretch and fold the dough to develop the gluten. Wet your hands with cold water before each fold so that the dough doesn’t stick to your fingers.
- After 4-5 rounds of stretches and folds, the dough should have started inflating with air and getting a little jiggly. That’s how you know the yeast and bacteria are active. If it’s not getting jiggly yet, just let it keep hanging out at room temperature (covered) until jiggliness is achieved, checking it every 30 minutes or so. At this stage, transfer the dough onto a lightly floured work surface.
- Shape your boule, close up the bottom seam, and put it in a floured and covered proofing basket (seam side up) overnight. By the next day, it should have expanded further.
- Preheat an oven to 475F with a Dutch oven inside. Let the Dutch oven hang out in the oven for about 30 minutes after the oven has fully preheated.
- Transfer your proofed boule into the Dutch oven, score it, and put the Dutch oven’s lid on.
- Bake at 475 with the lid on for about 20 minutes. Remove the lid, drop the temp to 425, and continue baking until the crust is nicely caramelized and the internal temperature of the bread reaches 205-210F (about 20-30 minutes).
- Let rest at room temp until cool before slicing.
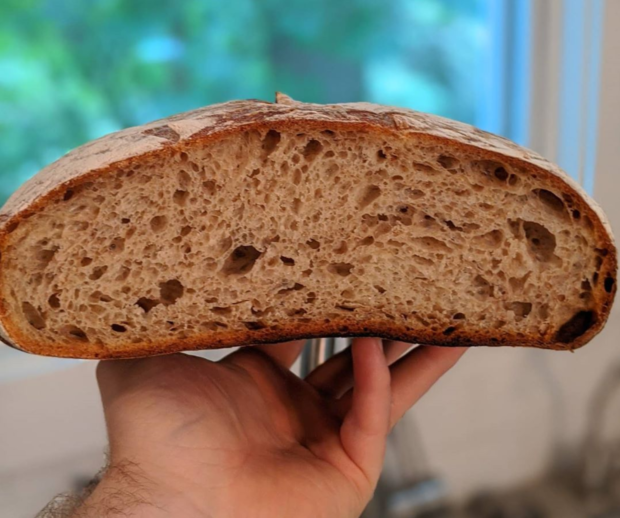
Honestly, this technique has been a game-changer for me. It seems pretty robust and nearly fool-proof (I don’t have to be super precise about how much kefir or commercial yeast I add initially, and the timing for the starter seems to have at least several hours of leeway), and the results I’ve been getting are virtually identical to the results I got when baking with a happy culture I was tending every day. The bread is just as good, and the starter behaves exactly like a wild yeast starter. I haven’t sent it to a lab for analysis, but the taste and behavior lead me to believe that all of the commercial yeast dies off during the long 12-16 hour rest, leaving only wild yeast in my cheater starter. So now, instead of needing to remember to tend a starter every day (and wasting a lot of flour in the process), I just have to remember to get my cheater starter going the night before I plan on making bread.
If you’ve wanted to give sourdough a shot, but you either don’t want to tend a starter or you’ve had trouble with keeping a starter alive, give this little hack a shot. You won’t regret it!